


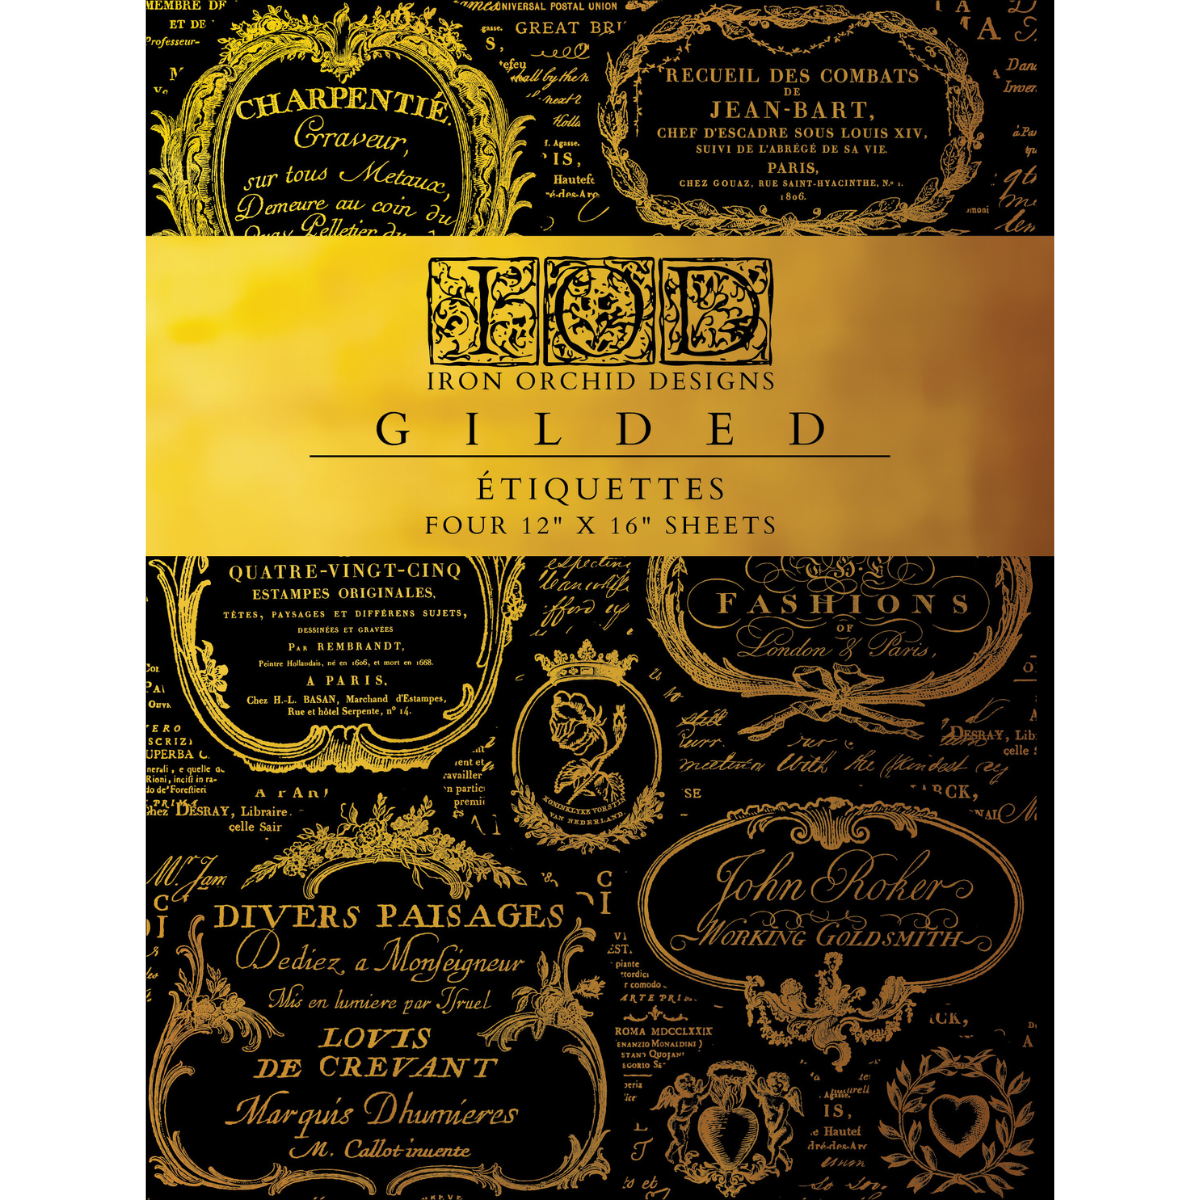
Iron Orchid Designs - Etiquettes Foil Transfer Pad
Iron Orchid Designs - Etiquettes Foil Transfer Pad
Couldn't load pickup availability
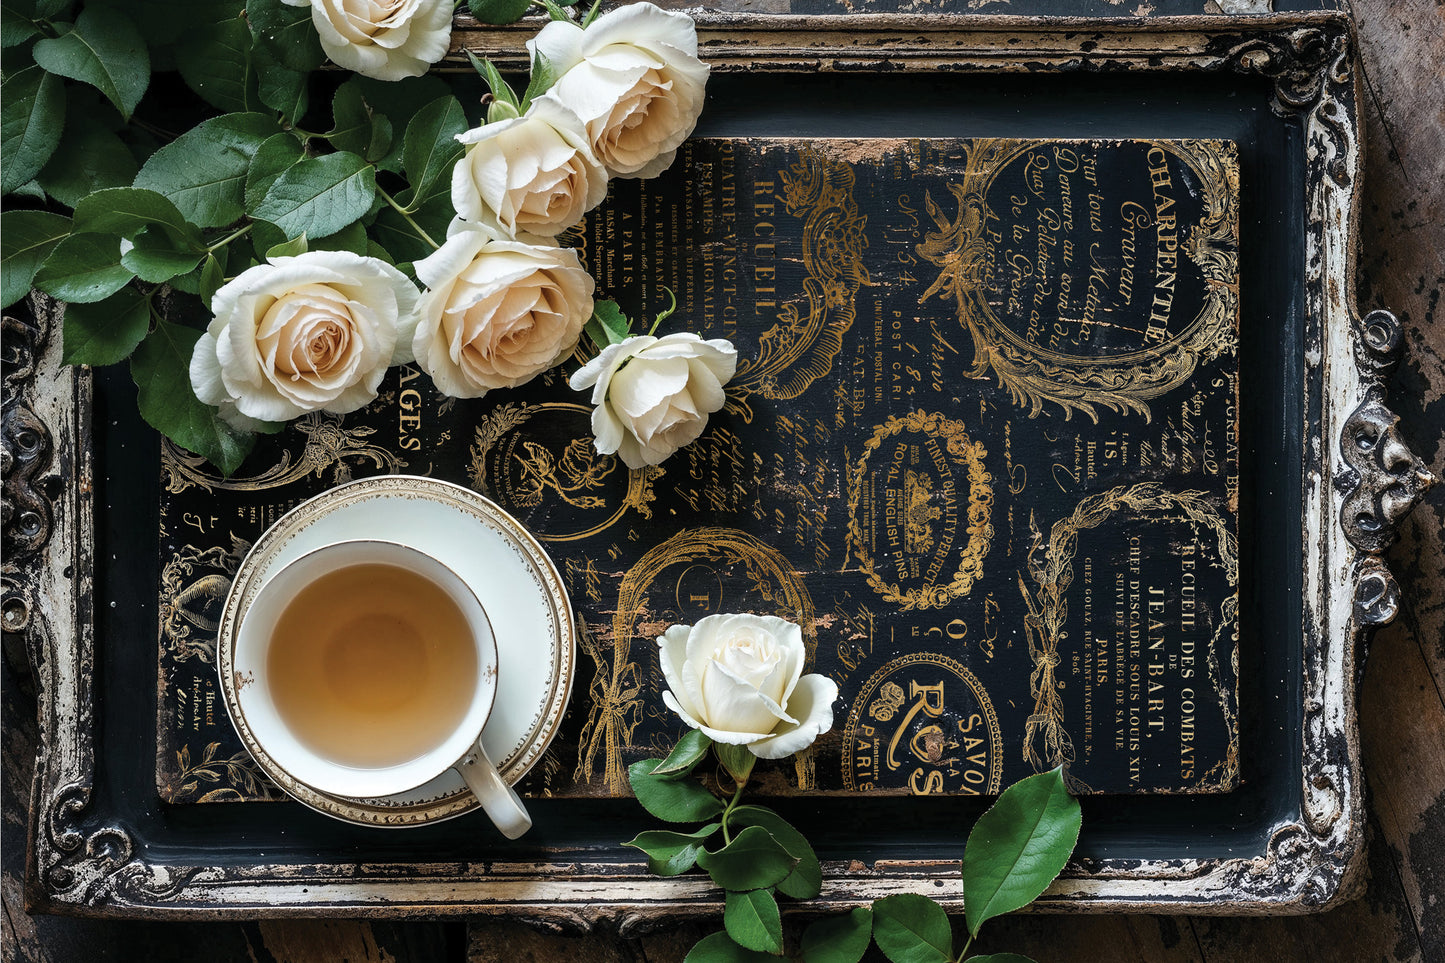
Étiquettes
Foil Transfer, 4 Pages, 12”x16”, Gold
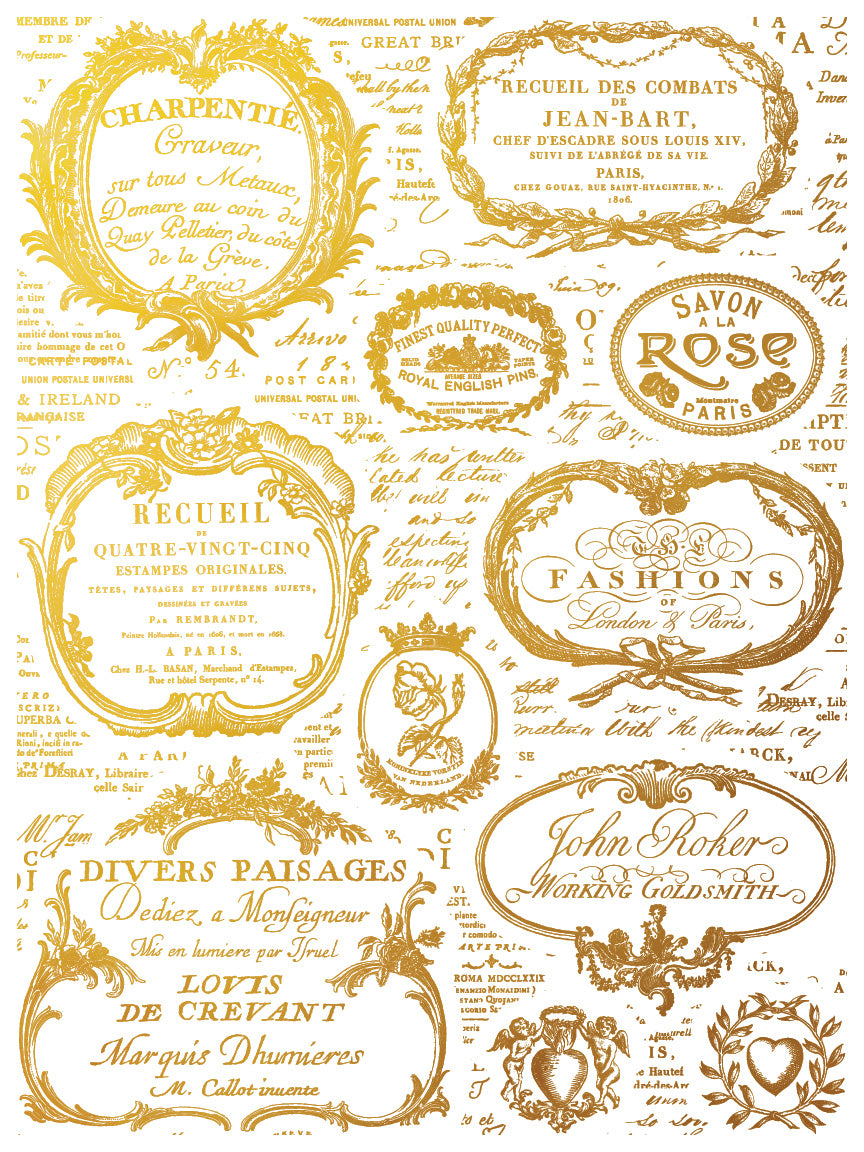
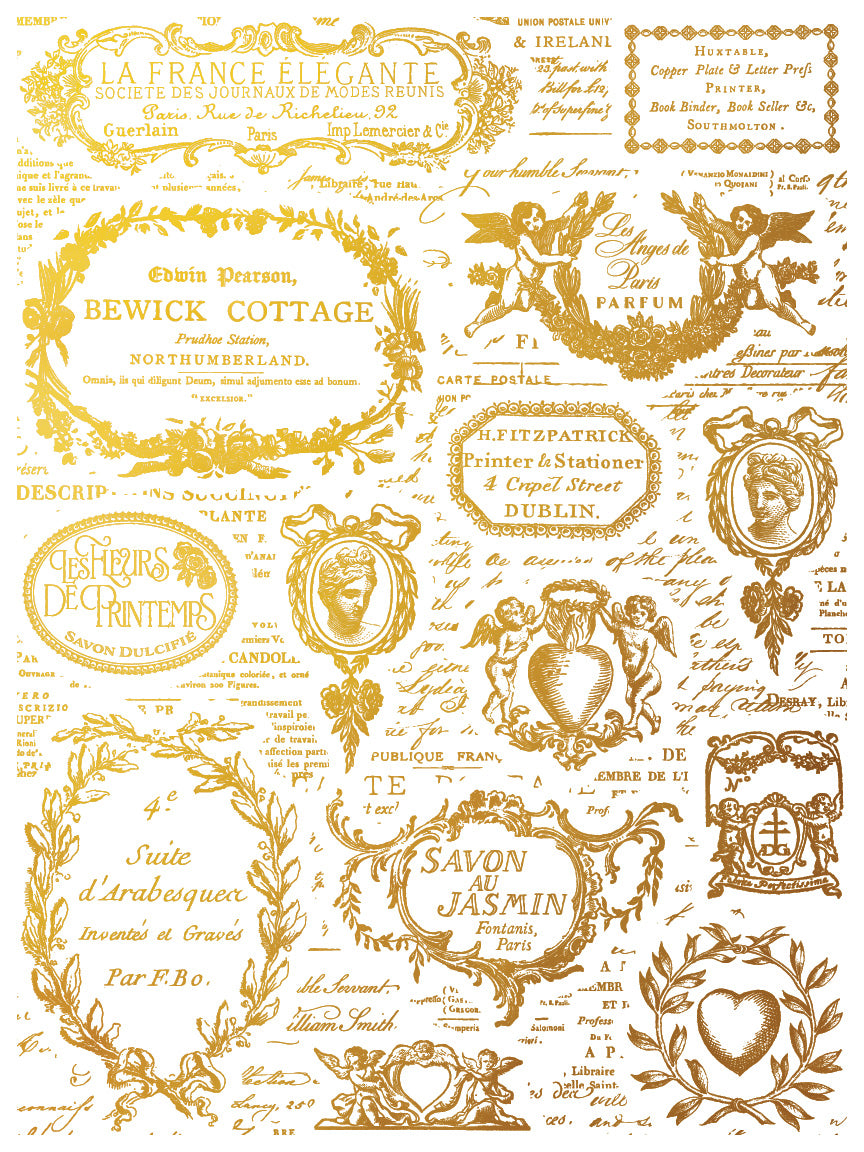
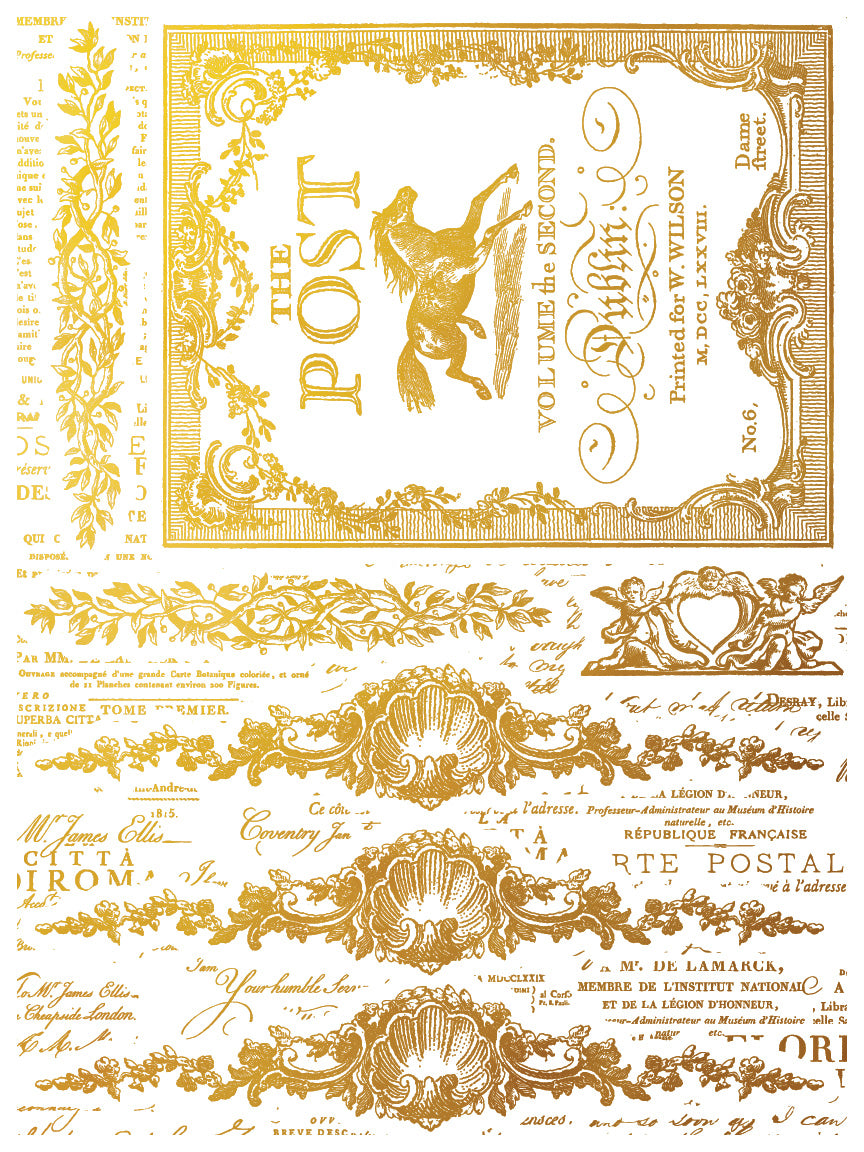
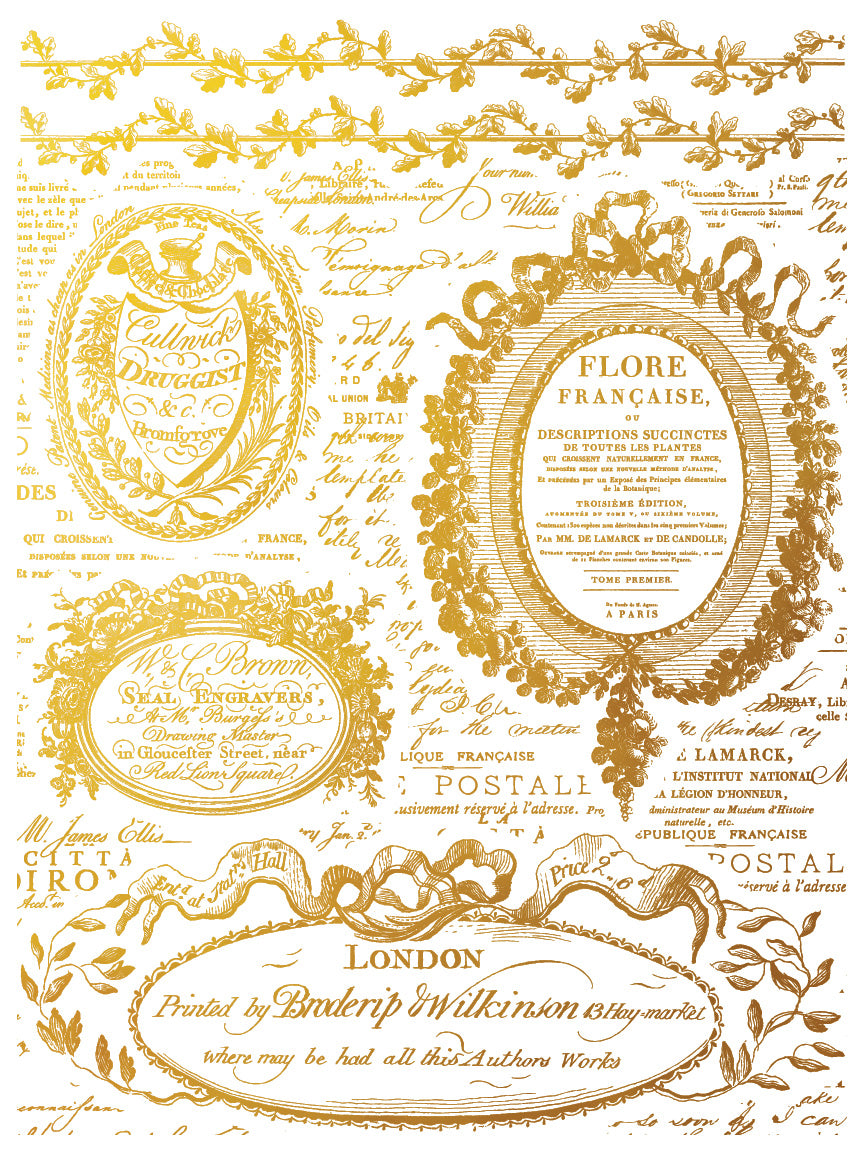
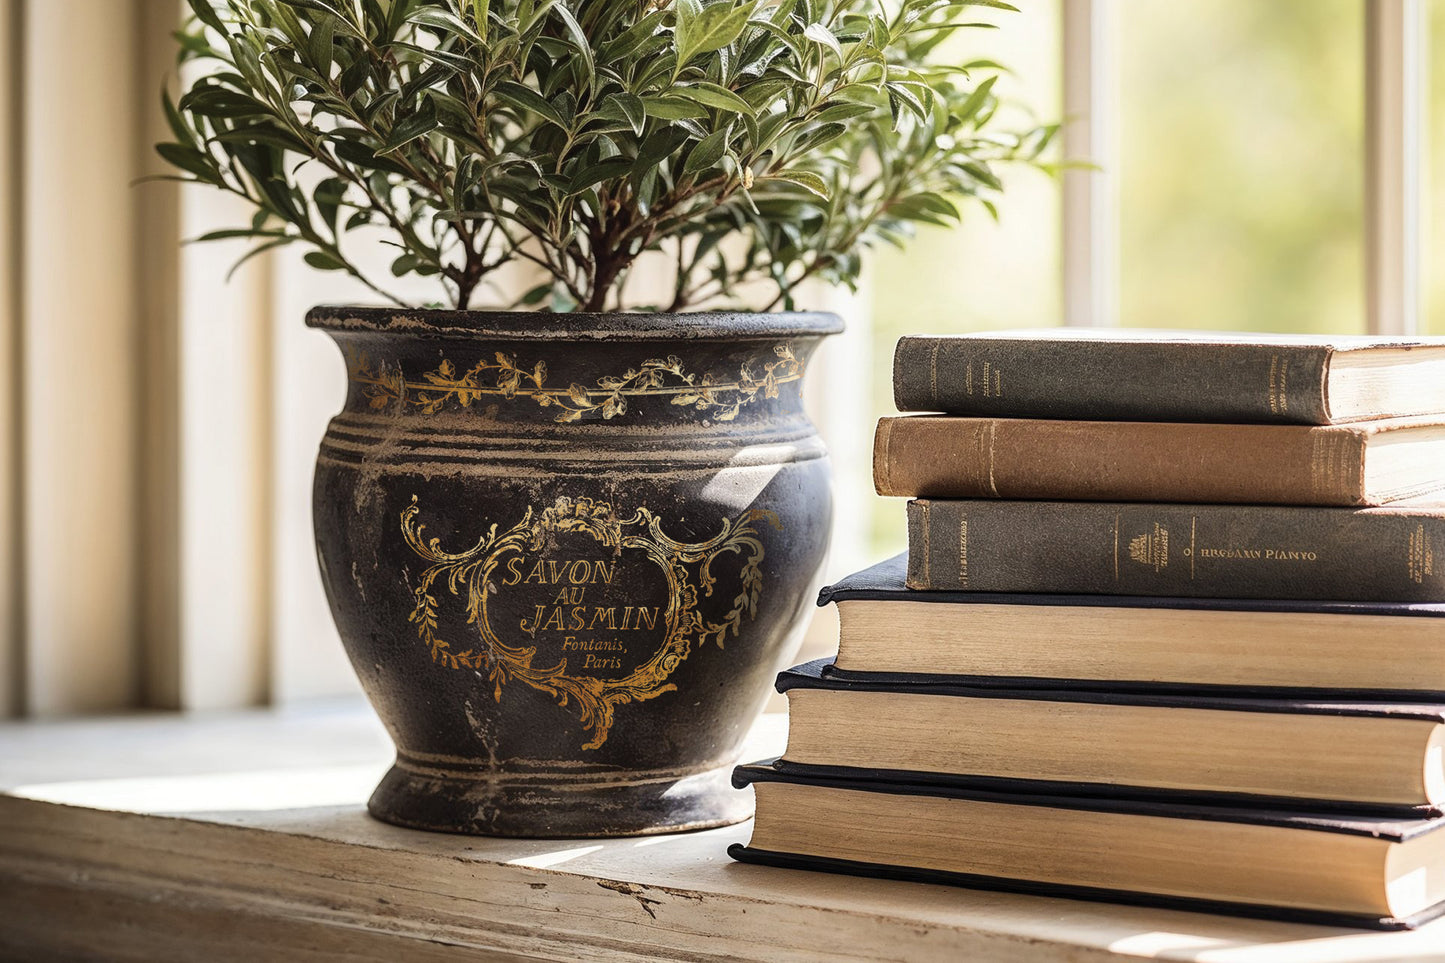
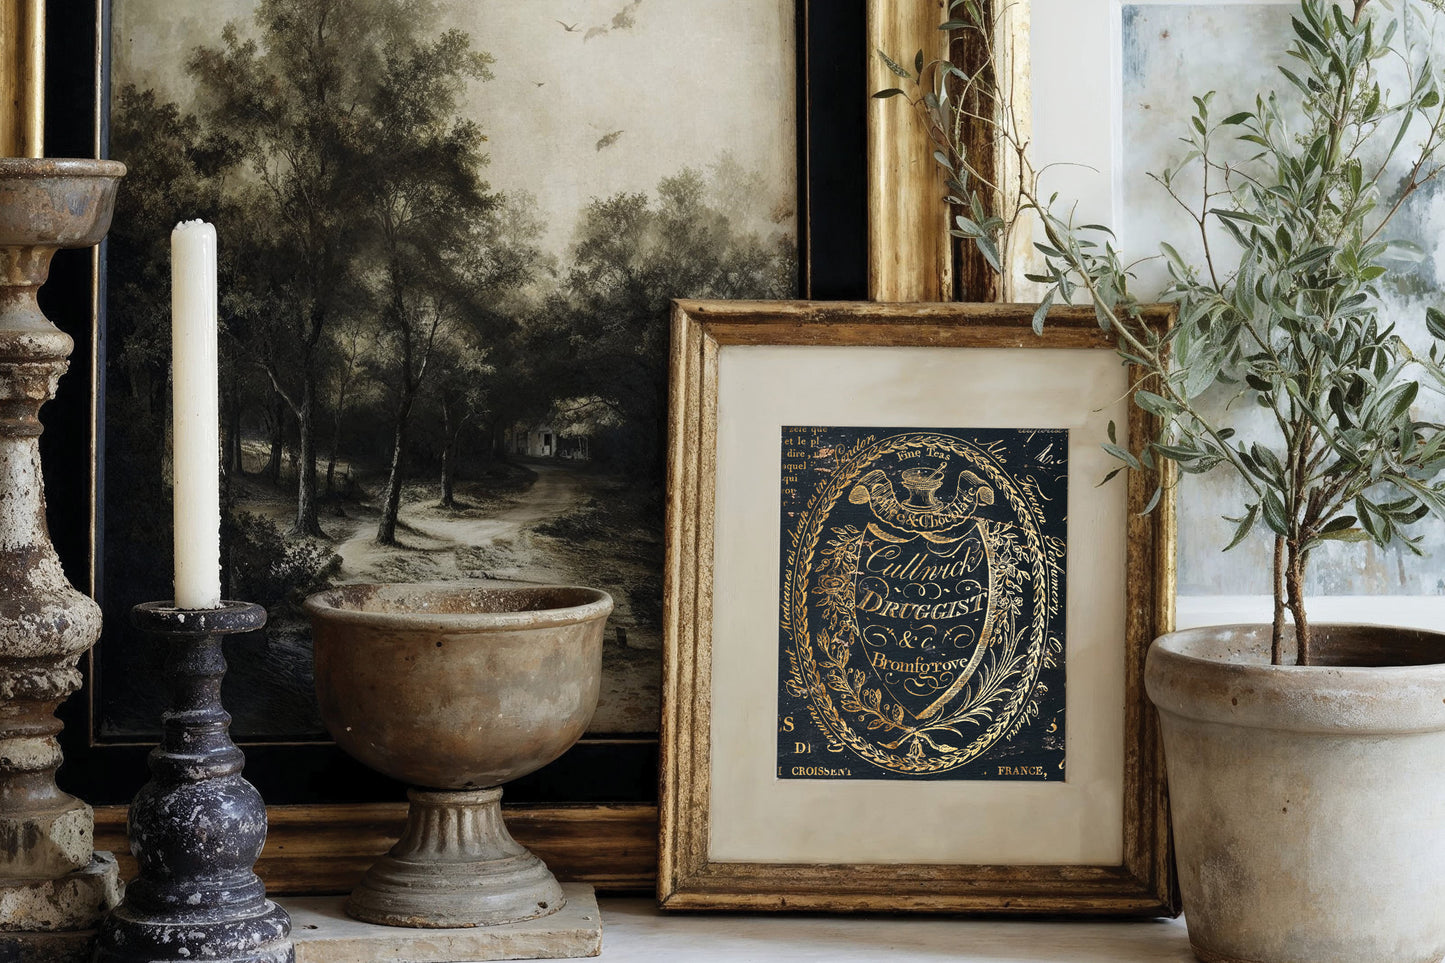
A sophisticated European gilded transfer collection, Étiquettes is perfect for goth-glam styles and seamlessly integrates into French farmhouse aesthetics when used on neutral colours and softened with a patina or slight antiquing. This collection features elegant labels and signage with flourished frames, intricate typography, and motifs reminiscent of 18th and 19th-century decorative art. Laurel wreaths, floral motifs, and frames inspired by 1800s calling cards add to its timeless charm. Use individual elements on your small projects, or apply the whole sheet as an all-over pattern.
Project Suggestions:
-
Small Decor: Dainty jewellery boxes, French-style toiletry jars, French-style gourmet gift jars, candles, lamps, vases, and flower pots.
-
Wall Art: Shadow box wall art with dark interiors and a frame accented with IOD Moulds.
- Craft: Embellish special occasion cards, invitations, or journals.
Pair With:
- Étiquettes pair well with most IOD Moulds like the Trimmings mould and Dainty Flourishes mould.
- Typography stamps like Letterpress and Apothecary Labels.
Handy Tip:
Depending on the final top coat used, you can maximize or play down the final sheen of the transfer to fit your project's aesthetic.
If you are familiar with traditional IOD Transfers, they apply similarly but may take a bit more patience in areas of fine detail. Take your time and don’t press any harder than you usually would, as this can hinder the release rather than help.
Share
All about IOD Transfers
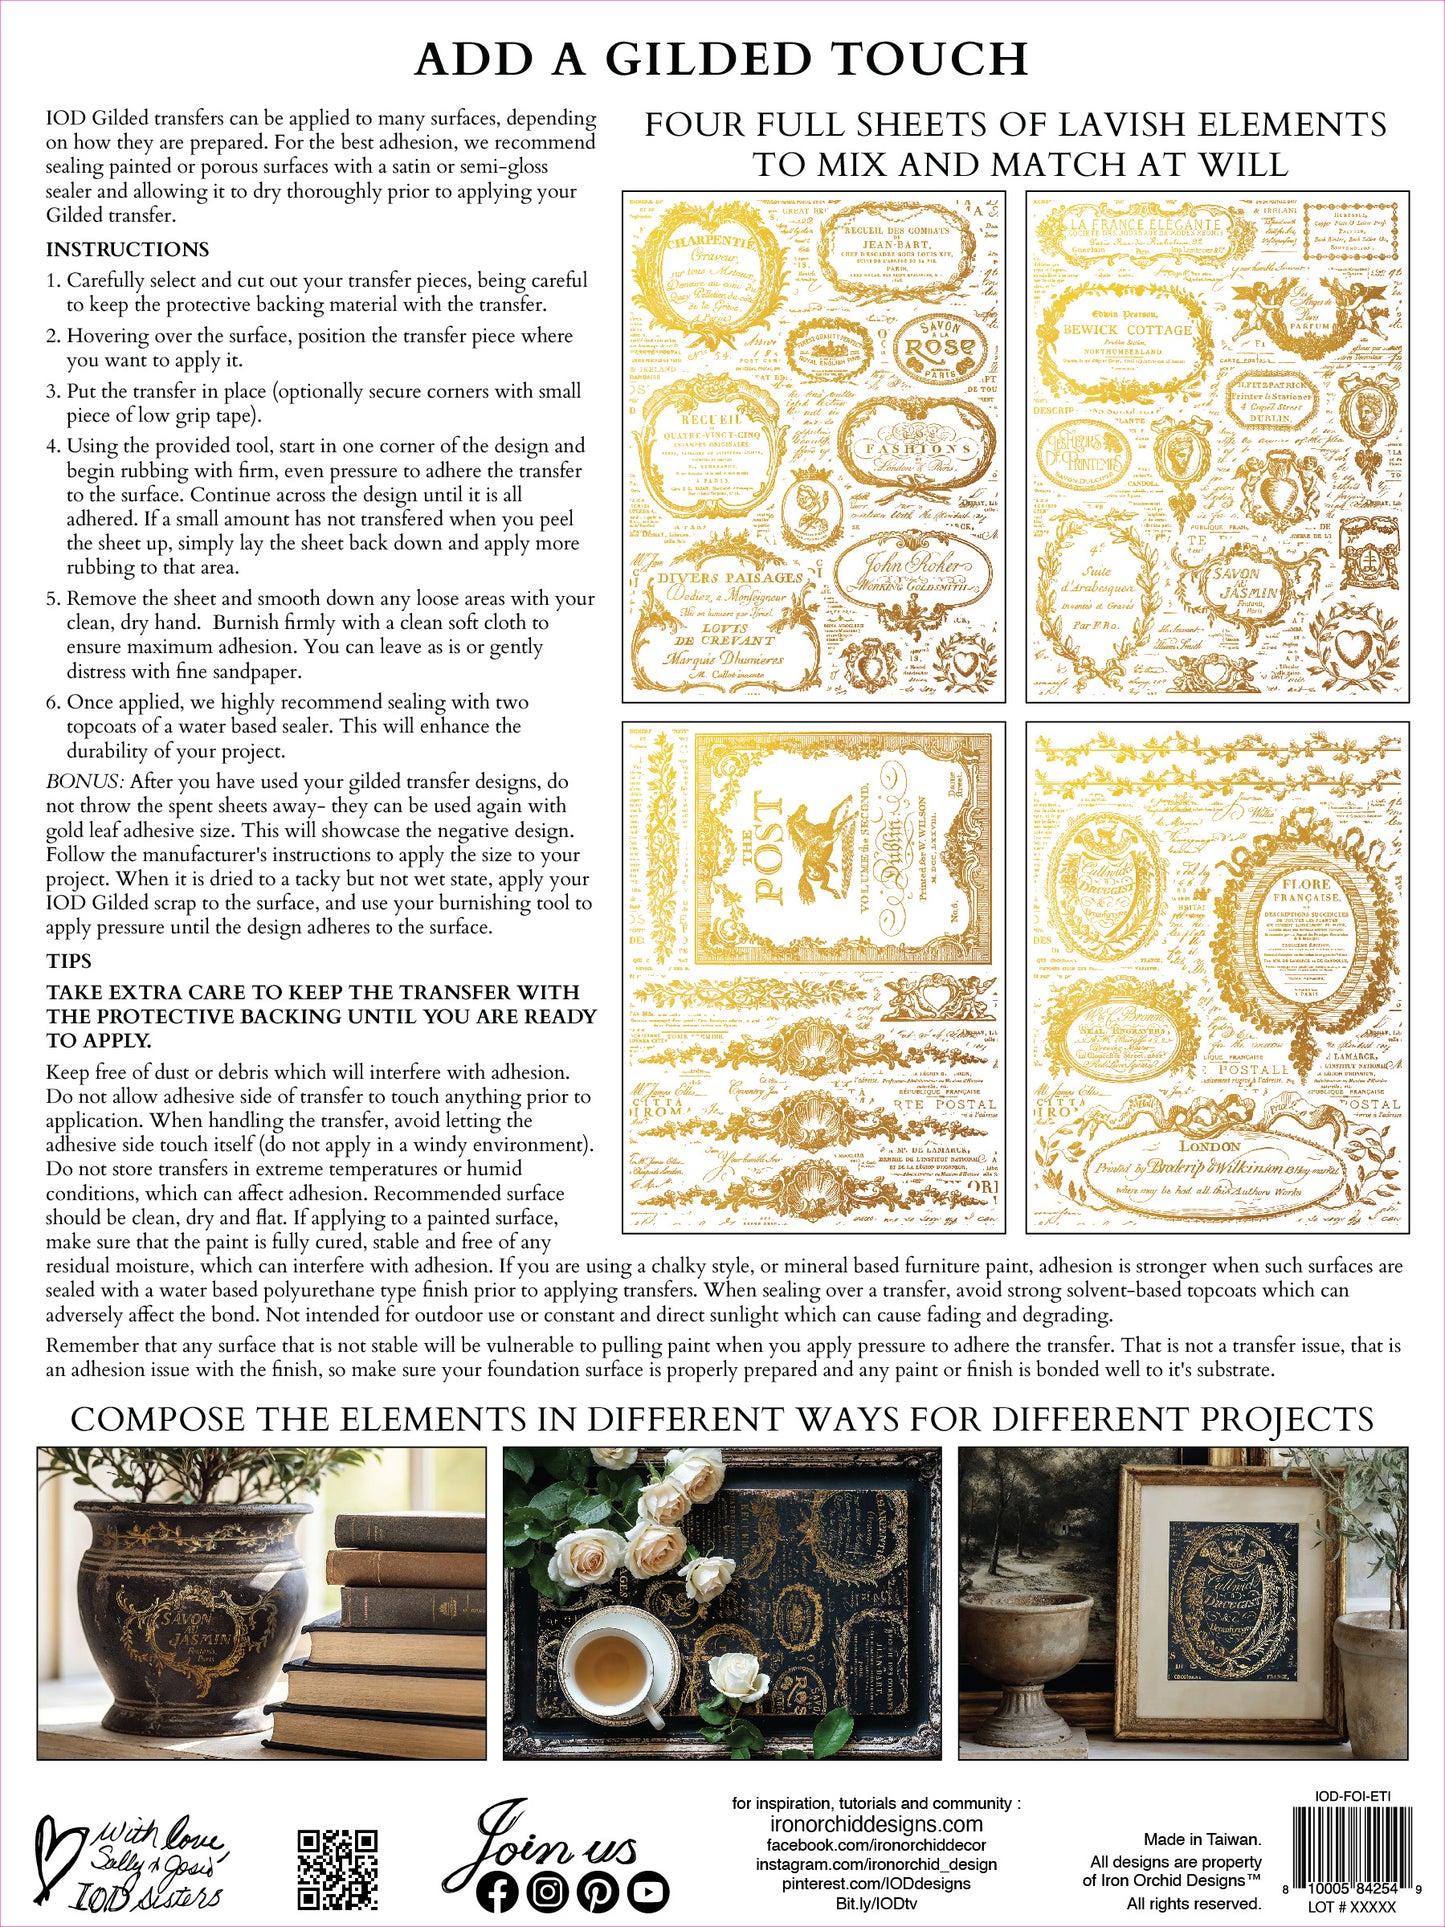
IOD Transfers are a little delicate, need a little extra care, but are so worth it. With a little instruction, they are easy to use and add instant style to your projects. (Make sure to check out our new White Transfers for a beautiful design on your deeper richer colours! )
PREPARATION IS KEY
Keep your transfer with its backing sheet until you are ready to apply. Keep free of dust or debris, which will interfere with adhesion. Do not allow the adhesive side of transfer to touch anything prior to application. When handling the transfer, avoid letting the adhesive side touch itself (don’t do in a windy environment). Do not store transfer in extreme temperatures or humid conditions, which can affect adhesion.
APPLICATION
Start with a clean, dry, matte surface. If painted, make sure it’s well cured, and if you have sanded the paint make certain there is no residual dust. All of these things will interfere with adhesion. For best adhesion, seal your project surface with a high quality, water-based polyurethane sealer in matte before applying a transfer.
Carefully remove the transfer from its white backing. Slowly and carefully lower the transfer onto your intended surface, making sure that it does not touch until the placement is correct. Use small pieces of low tack tape to hold it in place.
Using the provided tool, or one of your choice, start at one end of the transfer and rub firmly to adhere the image to the surface. Do this until the entire image is transferred. You are welcome for the free arm workout as well. If any parts aren’t transferred when you lift, simply lay it back down and rub more on that portion.
After it is transferred, with a clean dry hand, smooth down any bits that aren’t flatly adhered.We recommend sealing with a water based (or not harsh solvent based) sealer (waxes created for chalk type paints also work well if they don’t contain harsh solvents).
Watch our Transfer 101 video to learn how to apply and seal them with ease.